Search Products
Shop By Model:

19-100

Installation instructions for IliumWorks Highway Pegs 


Tools needed;

T25 Torx driver

T27 Torx driver

T55 Torx driver, 3/8” drive

8 MM Allen , 3/8” drive

3/8” breaker bar or ratchet wrench

Medium Strength Threadlocker (Blue Loctite)


Maximum Torx Specifications:

10mm bolt, 40 foot-pounds

12mm bolt, 60 foot-pounds


  1. Place bike on work stand or lift, in a well lit work area.
  2. For RT models only, it is necessary to remove all of the bodywork surrounding the engine. There are a lot of screws holding the body work on, be methodical and patient, making sure that all the screws are removed before you try to remove each piece of bodywork. Start at the top using the T25 Torx driver and remove the center tank trim, then the upper fairing panels on both the right and left sides. Remove the two black Torx screws that secure the glove box  lid and remove glove box lid.  Now remove all the screws holding the lower fairing panels , the two Torx screws nearest to the exhaust pipe will require the T27 Torx driver.  When all of the screws are removed, gently pull the body work off paying attention to the locating tabs and other obstructions as you go.  Once the body work is removed, installation is the same for all R1200 models.
  3. For all R 1200 models, install one side and tighten before going on to the other side.  Loosen and remove the M12x50 Torx screw securing the rear frame to the engine crankcase, using the T55 Torx socket and breaker bar.  Fit the rear mounting tube of the Highway Peg into the frame tube and reinstall the M12x 50 Torx screw loosely to hold  it into place.  Fit the M10x70 Allen screw through the front slot in the Highway Peg, through the spacer and into the M10 threaded hole in the side of the crankcase.  Lightly snug up both the M10 Allen screw and the M12 Torx screw, making sure that everything is tightening  properly and not interfering with any thing else.  The front mounting bolt hole is slotted to allow some up and down adjustment in insure clearance for body work and valve cover guards.  If you are installing on an RT, try to refit the lower fairing panel and make sure that you have clearance for the bodywork, it will be close, but it should fit.  When you are satisfied that everything is in its proper location, remove one bolt at a time, and using the Blue Loctite retighten each bolt to the proper torque setting.
  4.  Repeat this process for opposite side.  For RT installations you may now replace the bodywork in the opposite order that it was removed.  Take your time and be methodical refitting the lower fairing panels, it is easier to slide them over the Highway Pegs if the are in the extended position.
  5. Now that the Highway Pegs are installed, it is time to adjust them for length.  First, using the supplied 5/32 Allen wrench, loosen all four 10-32 Allen screws in the mounting clamp enough that you can move the rear clamp back far enough to disengage the locating pin from the rear of the adjustment tube.  There are locating holes on ½” centers along the back side of the adjustment tube, slide the peg assembly forwards or backwards into the desired position, and making sure that the locating pin is properly seated in the desired adjustment hole, snug all four 10-32 Allen screws evenly.  Sit on the bike and insure that the fore and aft adjustment in correct and comfortable.  When you have determined that it is correct, remove one screw at a time, apply Blue Loctite and retighten to the appropriate torque.
  6. Insure that all of the motorcycle’s controls are operating properly and without interference, after riding approximately 100 miles, recheck all bolts and screws for tightness.
  • New Releases from Ilium Works

    Ilium Works is proud to announce the 29-200 HIGHWAY PEGS for the R1250 GS Adventure.

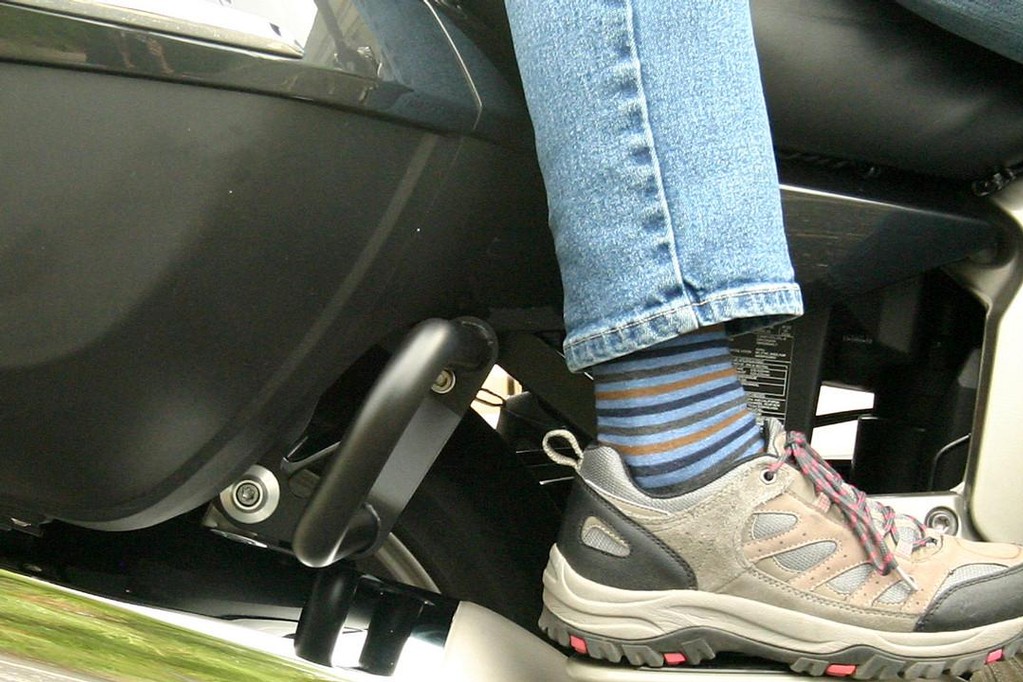
    The factory engine guard bar configuration has presented quite a challenge when it comes to properly mounting a comfortable highway peg. Our new part number 29-200 Highway Pegs address this problem with a unique mounting system. A gracefully curved 1/4" X 1” stainless steel bar connects the upper and lower bars of the factory engine guard and provides a sturdy foundation to mount the highway pegs in the proper location.


    The 29-300 GSA Highway peg is offered with the Gripper pad.


    Carefully designed Rear Crash Bars to help protect your expensive panniers and mufflers, these minimalist design bars will not interfere with passenger comfort or the clean lines of your R1200RT Oil head, R1200RT Water Cooled, R1250RT or K1600GT / GTL / GTLE.

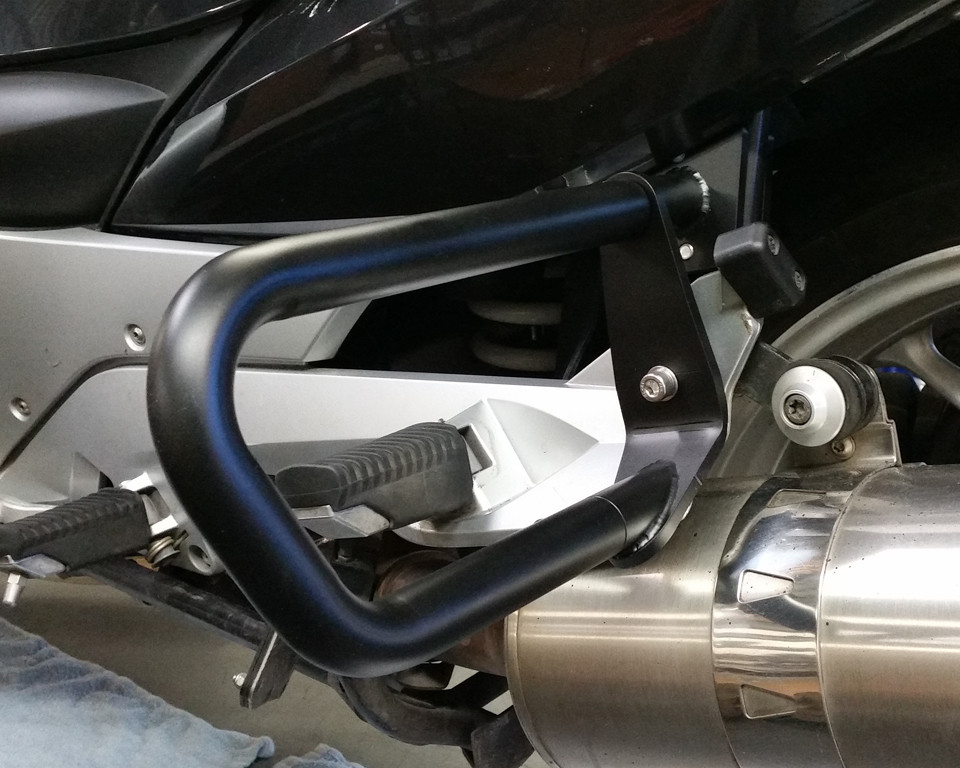
                                                                                                                                                                                                                                                       These Rear Guard Bars, Part# 11-800BL are designed to work in conjunction with our P/N 19-600 Highway Pegs to offer the best overall protection for your 2005 – 2013 R1200RT in the event of a drop or tip over. These can also be used in conjunction with other manufacturer’s engine guard bars as well. These bars are constructed of heavy wall (1” X .120” ) steel tubing and TIG welded to 7 ga. cold rolled steel brackets. After shot blasting with stainless steel media, these bars are powder coated for a durable and trouble free finish in Satin Black for a subtle look.


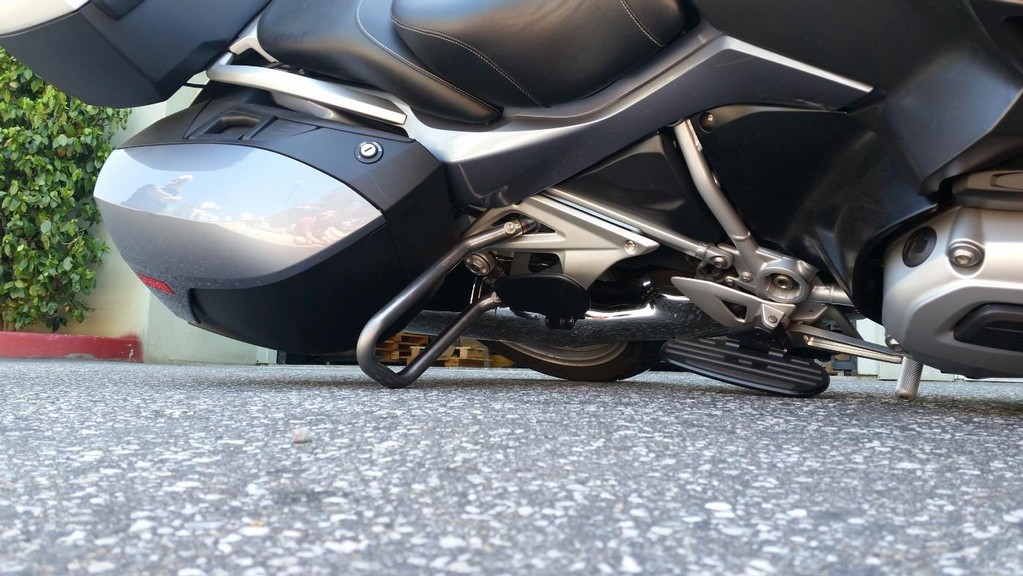
     These Rear Guard Bars, Part# 30-800 / 30-800BL are designed to work in conjunction with our P/N 30-200 / 30-200BL (R1200RTW) or 36-200 / 36-200BL (R1250RT) Engine Guard Bars to offer the best overall protection for your R1200RT WATER COOLED or R1250RT in the event of a drop or tip over.  These can also be used in conjunction with other manufacturer’s engine guard bars as well.  These bars are constructed of heavy wall  (1” X .120” ) steel tubing and TIG welded to 7 ga. cold rolled steel brackets.  After shot blasting with stainless steel media, these bars are powder coated for a durable and trouble free finish in either Silver Metallic to complement the frame colors, or Satin Black for a more subtle look.


     These Rear Guard Bars, Part# 26-900 / 26-900BL are designed to work in conjunction with our P/N 26-500 / 26-500BL Engine Guard Bars to offer the best overall protection for your K1600 in the event of a drop or tip over.  These can also be used in conjunction with other manufacturer’s engine guard bars as well.  These bars are constructed of heavy wall  (1” X .120” ) steel tubing and TIG welded to 7 ga. cold rolled steel brackets.  After shot blasting with stainless steel media, these bars are powder coated for a durable and trouble free finish in either Iron Glimmer to complement the frame colors, or Satin Black for a more subtle look.

Powered By Zomix Content Management Systems copyright © 2024